5 Cleaning Hacks That Will Make Your Kitchen Cabinets Look Brand New (No Magic Required!)
2. 🍶 Vinegar Solution for Sticky Residue & Shine
Best for: Adhesive residue, fingerprints, hard water spots, and restoring shine
Why it works: Vinegar’s mild acidity dissolves mineral deposits and sticky films without harsh fumes.
How to do it:
Mix equal parts white distilled vinegar + water in a spray bottle
Lightly mist onto a cloth (never spray directly on cabinets—vinegar can damage finishes over time)
Wipe down surfaces, focusing on handles and around knobs where grime accumulates
Buff dry with a clean microfiber cloth for a streak-free shine
⚠️ Caution: Don’t use vinegar on natural stone, waxed wood, or unfinished surfaces—it can etch or strip finishes.
3. 💨 Ammonia for Heavy Grease Buildup (Use Sparingly!)
Best for: Stubborn, baked-on grease near stovetops or range hoods
Why it works: Ammonia is a powerful degreaser that breaks down tough oil residues.
How to do it:
In a well-ventilated area, mix 1 tablespoon clear ammonia + 1 quart (4 cups) warm water
Dip a soft cloth into the solution, wring thoroughly
Gently wipe greasy areas—do not soak the surface
Immediately rinse with a damp water-only cloth
Dry completely
⚠️ Safety First: Never mix ammonia with bleach or vinegar—it creates toxic fumes. Wear gloves and open windows!
4. 🥥 Baking Soda Paste for Scuffs & Stains
Best for: Scuff marks, light stains, or discolored areas on painted cabinets
Why it works: Baking soda is a gentle abrasive that lifts surface stains without scratching.
How to do it:
Make a paste with 2 parts baking soda + 1 part water
Apply with a soft cloth or toothbrush using circular motions on stained areas
Wipe clean with a damp cloth
Dry immediately
✅ Bonus: Works great on white cabinets that have yellowed near the stove!
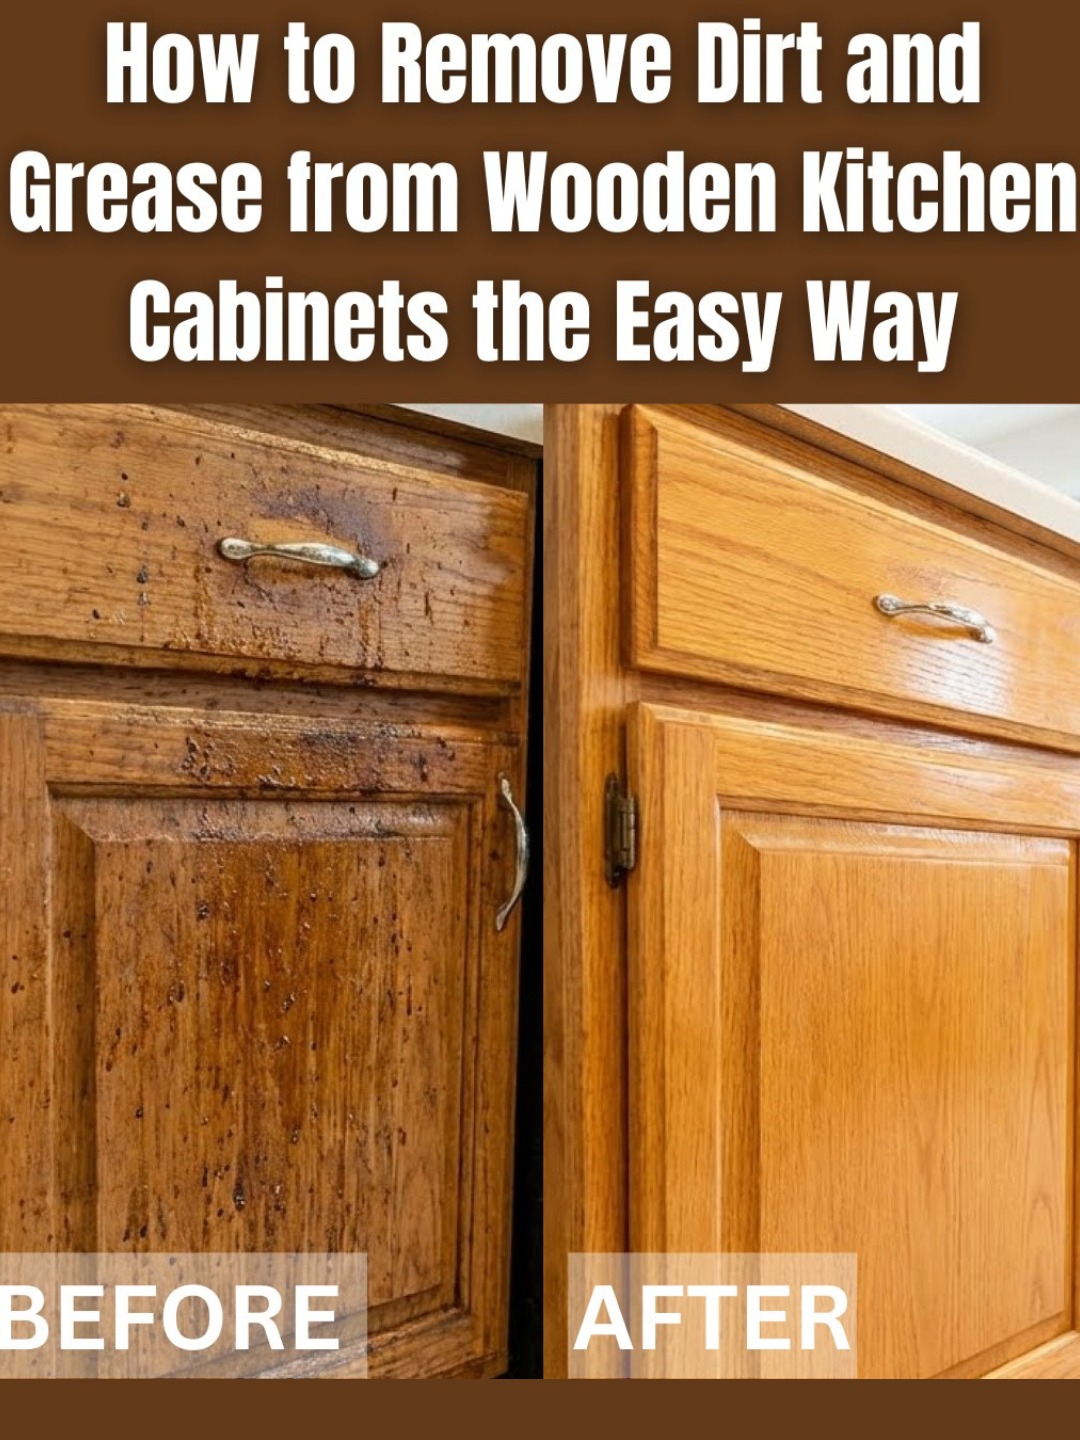
5. 🌿 Olive Oil + Vinegar Polish for Wood Cabinets
Best for: Restoring luster to natural or stained wood cabinets
Why it works: Olive oil conditions the wood, while vinegar cleans—leaving a soft sheen without synthetic polishes.
How to do it:
Mix 2 parts olive oil + 1 part white vinegar
Apply a small amount to a soft cloth
Rub into wood with the grain
Let sit 5–10 minutes, then buff to a shine with a dry cloth
🌟 Note: Use sparingly—too much oil can attract dust. Do this only once every few months.
What NOT to Do When Cleaning Cabinets
❌ Don’t use steel wool or abrasive scrubbers—they scratch finishes
❌ Avoid all-purpose cleaners with bleach or alcohol—they dry out wood and fade paint
❌ Never soak cabinets—moisture seeps into seams and causes swelling or delamination
❌ Skip paper towels—they leave lint and can scratch glossy surfaces
Maintenance Tips to Keep Cabinets Looking New
Wipe down fronts weekly with a dry microfiber cloth
Clean handles and knobs twice a week—they collect the most grease and germs
Install a high-quality range hood to reduce airborne grease
Use a splatter screen when frying to minimize oil mist
FAQs: Your Cabinet Cleaning Questions, Answered
Q: Can I use these methods on laminate cabinets?
A: Yes! Stick to dish soap or vinegar solutions. Avoid ammonia and oil on laminate.
Q: How often should I deep-clean cabinets?
A: Every 3–6 months, depending on cooking frequency. Spot-clean weekly.
Q: My cabinets feel sticky after cleaning—why?
A: Likely soap or cleaner residue. Always rinse with a clean, damp cloth after cleaning.
Q: Are there eco-friendly alternatives to ammonia?
A: Yes! Try castile soap + warm water or a citrus-based degreaser for heavy grease.
Q: Can I clean inside the cabinets too?
A: Absolutely! Empty them, vacuum crumbs, then wipe with soapy water. Line shelves with fresh paper for a fresh feel.
The Bottom Line: Shine Without the Stress
You don’t need expensive cleaners or a weekend renovation to revive tired cabinets. With a few pantry staples and 30 minutes of focused effort, you can remove years of grime and restore your kitchen’s glow—all while protecting your cabinet finish.
So roll up your sleeves, grab that microfiber cloth, and give your cabinets the love they deserve. Because a truly clean kitchen isn’t just about the counters—it starts from the top down.
Tried one of these hacks? Share your before-and-after results below! We’d love to see your sparkling cabinets—and hear which method worked best for your kitchen. 🧽✨